Tuesday, December 31, 2013

2014 Project Life


 Finally decided to stick with Becky Higgins' Project Life products for my 2014 Project Life Album.  
I chose the Honey Album and Core Kit that you see here.  

I had thought about going smaller and use a Simple Stories 6 x 8 but decided to stay with the Becky Higgins line.  This will be my fourth or fifth year now doing Project Life.
Do you do Project Life, Project 365 or similar scrapbooking project?  What are doing in 2014?

Monday, December 16, 2013

Holiday Album divider page

 So back to the Holiday Album I showed you a few posts back.  I painted one of the Simple Stories album page dividers white.  Then using white flocking material I created a snowbank along the bottom.  I painted some decorative wood trees green and used Liquid Pearls to decorate them.  I used yellow glitter glue for the top fo the tree.  For the background above the "snowbank" I used silver glitter paint in an attempt to make it look like it was snowing.  It looks better in person than in the photo. I had the red glitter snowflakes and added those to the "sky".

A closer look at the snowbank.
It didn't turn out quite as I envisioned it but I am happy with it overall and learned a few things along the way.  Now I need to figure out what I am doing with the back of this divider page!

Sunday, December 15, 2013

Finishing 30 Days of Thankful

 I rarely get into my craft room during the week so this project has taken longer than I would like.  I'm happy to have a complete album!
 I had it all finished except for adhering some photos so I got that finished today.  I had two photos from Thanksgiving that
I wanted to include so I got these Flip Flop fasteners out.  I adhered the two photos together back to back.

 There are quite a few Flip Flops on a sheet (2 sheets to a package).  I'm not sure if you can see them in the photos as they are clear.

 I adhered the Flip Flop the photo on the back of the photo I wanted to show first.  Fold the Flip Flop back on itself & position the photo.


 I used the Flip Flops here too.  Lots of snow photos this year.

Done.  I do plan to go back and add embellishments. But the album can stand on it's own if I never get back to it for which I am very happy!
Notes for next year:
Print Cathy Zielske's templates per instructions for a 6 x 6 album.  I did find out though that I did enjoy working in an 8 x 8 album size which I may choose for other future projects. 
Have pages ready to go before November 1st.
Gather possible embellishments through the year.
There are some things I am going to be grateful for each and every year and are a given.  I plan to take photos or gather photos of those topics prior to November.  Photo printing slowed the project way down so I'd like to have a head start on those even if I don't end up using the photos for the project. The writing is what gives the album the voice of what I am thinking at feeling on that day.
I also plan to add one of the projects that I shared through the month to next year's preparation for Thanksgiving.  I like being so much more intentional and thoughtful about Thanksgiving.  It's carried over into December and I like that.
I hope to be back shortly with an update on my Holiday Album.
How are your Christmas preparations coming? 

Wednesday, December 4, 2013

Journal Your Christmas


 Here is a look at my Journal Your Christmas album. 

The numbers are flat number
stickers that I used Glossy
Accents on to make them
look raised.


I used the Glossy Accents on the diamond shapes in the patterned card and on the berries too.  I used pop-dots to have the banner card and holly & berries stand-out.  Ribbon from my stash and December Documented from Simple Stories are the other products used.  The silver reindeer shown in the first photo ended up on the inside of the back cover.  See yesterday's post for details on the painting of the album. Links to the Simple Stories December Documented products I am using this year can be found on the right.  

Tuesday, December 3, 2013

Journal Your Christmas 2013

 This last week I put aside my 30 Days of Thankful project to begin preparing my album for Journal Your Christmas.
I started with a basic Simple Stories album and painted the brown chipboard part black.  I just used an acrylic paint from Michaels.  
I then use Martha Stewart's silver glitter paint to cover the front of the album .  Let that dry I started on the divider pages.  


I haven't quite figured out how I'm breaking out the topics. 
I'm thinking preparation, every-day and Christmas day but that could change as I go on.  I've also considered a memories section but I'm not sure if I'll have a lot of time to work on that.  As you can see from the photo above the divider pages began to curl but they flattened out as they dried.  
I've done December Daily for the last 2 years and decided to use Shimelle's Journal Your Christmas this year.  With December Daily I felt like I was forcing my story into someone else's formula so I'm hoping this feels more authentic.  I hope too that I have time to build it on a daily basis.  I liked having the album ready by December 1st with December Daily but it did not leave room for changes in plans, life getting busy, etc.  
I'm looking to have less filler and more content.  
Do you have any plans for documenting your Christmas?

Monday, December 2, 2013

Three more Thankful pages


Three more pages of Thankful.  Isn't my grandson adorable?  I can't believe how well he posed - he's only two!

Sunday, December 1, 2013

End of vacation week

My vacation week is coming to an end.  I head back to work in the morning. So while I've not been posting my 30 Days of Thankful pages on a a daily basis like I had hoped to, I have been very aware of the many things each day I have to be thankful for.  I think, too, it's important to live your life first and document it, second.  So I've been living and creating this last week.  Now to show you some of my finished pages for my 30 Days of Thankful album. 
 I've been having a lot of fun with Pinterest this year and actually creating/doing several of the ideas I've pinned!
Day 20 - thankful for Pinterest  


Day 21-thankful for Pumpkin (our youngest cat)

Day 22 - thankful for Patch (our oldest cat)


Day 23 - thankful for weather alerts
We've had some snowy weather (a foot of snow one day!) and some really cold temperatures so it's good to be prepared!

Thursday, November 28, 2013

Happy Thanksgiving!

Photo: We are thankful for so much (much more than we could fit on this board!), but mostly we are thankful for each other and the ones we love that love us too :-) Happy Thanksgiving from the Browns!!My friend, Kerri, posted this today on Facebook and I asked her if I could share it here today.  I love this!  So simple and easy to do...  
Kerri purchased this chalkboard as you see it and she suggested that you could make your own with an old window frame, plywood and chalkboard paint.  
I hope you've had a wonderful and thankful Thanksgiving!

Wednesday, November 27, 2013

Thanksgiving Eve

This month has just flown by (as usual)!  My husband and I will be celebrating Thanksgiving tonight as he works 12 hour shifts the next two days.  Our grown children live on the opposite side of the country from us so it's just the two of us.  Dinner will be a pared down version from what it has been in the past but hopefully just as yummy!  
I've been on vacation this week. I'm enjoying not getting up at my usual time and really enjoyed not driving to work this morning after the foot of snow that fell yesterday and last night!  
I've not been out of the house except to take Lily (our dog) out so I've not gotten the rest of my photos to work on more 30 Days of Thankful pages. Tomorrow I'll probably venture out again.
In the meantime I wanted to share that in the November edition of "Family Fun" magazine there is an article about teaching your kids about gratitude that I thought those of you with children may be interested in.  I really liked several of the ideas listed in the article but I think my favorite is taking strips of red and green construction paper to make a gratitude chain.  Each day the child writes down something they are grateful for on a green strip of paper and a good deed they performed on a red strip of paper.  Staple the ends of the strip to create a circle and with the next strip place it through the circle and staple to create a chain.  At the end of November you have a holiday chain to decorate your house or tree.  
I'm getting ready to do Journal Your Christmas with Shimelle this year.  I did a December Daily style album last year (for the 2nd year) and followed along with Shimelle's Journal Your Christmas (JYC).  I'm really looking to do more journaling this year and pull in some Christmas memories as well so I'll be following JYC much more closely this year.  
Guess I better go get dinner started....Have a wonderful and thankful Thanksgiving!  
 

Monday, November 25, 2013

Today I am thankful for Pinterest.....


I'm not showing you one of completed 30 Days of Thankful pages today as I wanted to show you how I took a Pinterest pin and created washi tape and journaling card storage and organization.
The pin below is from the blog "A Bowl Full of Lemons".  If you are into organization, planners, office supplies, etc then you need to check out this blog.

washi tape storage on A BOWL FULL OF LEMONS

I thought this was a really clever idea to use dowels and 3M Command hooks to create washi storage.  I then took it a step further......

 Office supplies you may already have on hand.
 3M Command Center General Purpose Wire Hooks
3 hooks per package
Holds 1/2 pound
(Disclaimer:  I am not a paid spokesperson for 3M/Command products)
 I already had the dowels so it was just a matter of attaching the hooks to the wall so that the dowel fit on the hooks properly.  Super easy.  Totally my style!  My washi tape looks really pitiful.  I have more. Somewhere. I have to track it down.  I had two rolls that were much bigger that did not fit on the dowel.
 Since I knew I would not need the second dowel for washi tape I came up with this idea.  I put the clips on the rings and slid them onto the dowels.
 I've got six on there to start with.
I plan to add more after I use this for awhile.  I 
find it helpful to live with something to see how it
works first and then add to it over time.  As you can
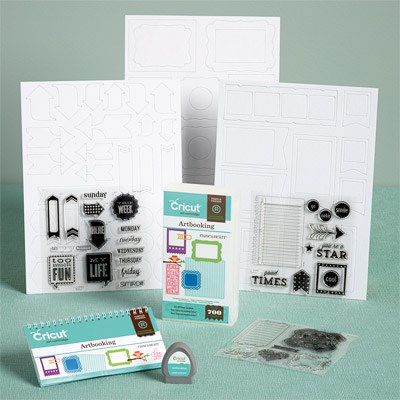
see I have a package of buttons clipped on, several different types of journaling cards and 2 stamp
sets that are an odd size and don't fit with the rest of my stamp storage.  I use them for my Project Life pages.
This dowel is next to the table where I work on my Project Life album and I think this will be a great way to put items out on display and  actually put them into my albums.
I also have to give credit to Big Picture Classes and their Organizing FUNdamentals class that I took earlier this year.  Thanks to that class (and Wendy & Aly, the instructors) I have an organized, albeit messy, craft room that I enjoy being in.  I think about space differently and how to use/repurpose things for organizational purposes.  If I hadn't taken Organizing FUNdamentals I probably would not have paid attention to the Pinterest pin at the top of this post.  
Do you enjoy Pinterest?  Have you made or completed projects that you have pinned?

Sunday, November 24, 2013

End of year giveaway


 End of Year Giveaway

On December 26th I will be giving away the following Close To My Heart products:
  • a Cricut Artbooking Collection
  • a Designed Decor Frame in either white or black
  • a My Crush book (similar to SMASH book)
  • Designed Decor Flip Stand Album
  • 3 stamp sets  
In order to be eligible to win one  of these five items just place an order on my Close To My Heart website: 

http://craftycreativity.ctmh.com

between now and December 24th.  For each order placed, your name will be entered into a random drawing to be conducted on December 26th with the winners announced here and on my Close To My Heart Lynn Wigren Facebook page on December 26th.   Any order over $50 will have an additional entry in the giveaway as well. Here is a look at the items you could win......


Cricut Artbooking Collection

Take yoursCcrapbooking to never-before-seen levels with the new Cricut® Artbooking collection! With oodles of images in each of 15 layout themes, you can create several coordinating pages for each theme using just two keys and one dial size. Images include accents, borders, titles, overlays, photo mats—in standard photo sizes!—and more. The Cricut® keys are optimized for creating 12" × 12" pages in a jiffy. You'll also love creating 10 themed mini books, also optimized for several different sizes using just two keys and one dial size. When you're finished cutting, use the coordinating stamp sets and Dimensional Elements shapes to add even more pizzazz!

Collection includes:
1 – Cartridge (700 images: Font, Mini Books, Layouts)
3 – My Acrylix® D-size stamp sets
3 – 12" × 9" Dimensional Elements (3 sheets of different shapes)
Creative Feature Keys: Title, Photo Mat 1, Photo Mat 2, Icon, Border, Overlay.
Recommended blocks for included stamp sets: 1" × 1" (Y1000), 1" × 3½" (Y1002), 2" × 2" (Y1003), 3" × 3" (Y1006), 2" x 3½" (Y1009), 4" × 5" (Y1012).
Cricut® is a registered trademark of Provo Craft & Novelty, Inc. All rights reserved.

Designed Decor Frame
Your choice of the white or black frame.


Designed Decor Flip Stand Album

Over the next week I will have photos of the 3 stamp sets and the My Crush book along with more details on all of the products.  
Any questions, leave a comment or email me at laew@aol.com

Today I'm thankful for 10 days off of work!


Two more days done as I continue to put my photos and journaling together.  I started a stretch of vacation and holiday days over Thanksgiving week and am looking forward to some time in my craft room.  I have a long list of projects I'd like to work on.  My husband has a few days off at the start of the week but will be working 12 hour days on Thanksgiving and Black Friday so I'm hoping for 2 full days of creativity!  I'd like to take some time to go back and add some embellishments to the pages I've created.  If it doesn't happen it's not a problem.  I'm just happy that the project has been doable and I'll have a finished album at the end of the month!  I have lots of half-done projects that are my list to finish.  How about you?  Do you have projects that need finishing?

Saturday, November 23, 2013

Thankful for a weekend away.....


I spent last evening and most of today getting caught up with errands and cleaning after having been away all last weekend.  Last weekend was part business and part fun.  I attended a conference at a ski resort about an hour away from home and we stayed overnight there for two nights.  We had a wonderful time and the highlight for me was swimming in the Inn's indoor/outdoor pool.  We had the pool to ourselves on Saturday evening and were amazed at how warm it was.  Even in the outdoor pool where the outside temperature was 37 degrees!
I've gotten my photos printed and have started working on putting the pages & journaling together.  I'll have two more tomorrow to show you.  
How is your 30 Days of Thankful project going?